Are you ready to unlock the power of your IoT devices from anywhere, all without spending a single dollar? You absolutely can! In today's rapidly evolving technological landscape, the Internet of Things (IoT) is no longer a futuristic concept; it's a present-day reality. Understanding how to remotely access and control these devices is becoming an increasingly crucial skill, whether you're an enthusiastic hobbyist or a seasoned IT professional. This guide provides you with a comprehensive, step-by-step walkthrough, meticulously designed to empower you to securely connect to your IoT devices directly from your Mac.
SSH, or Secure Shell, stands as a cornerstone protocol in the realm of secure network communication. It provides a robust and encrypted pathway for accessing and managing remote devices, ensuring your data remains protected even over an untrusted network. The power of SSH lies in its ability to establish a secure channel, allowing users to not only manage their devices but also execute commands, transfer files, and automate tasks remotely. This makes SSH a particularly valuable tool in the context of IoT, where devices are often deployed in diverse and sometimes challenging environments.
| Key Feature | Description |
|---|---|
| Encryption | All data transmitted is encrypted, ensuring confidentiality. |
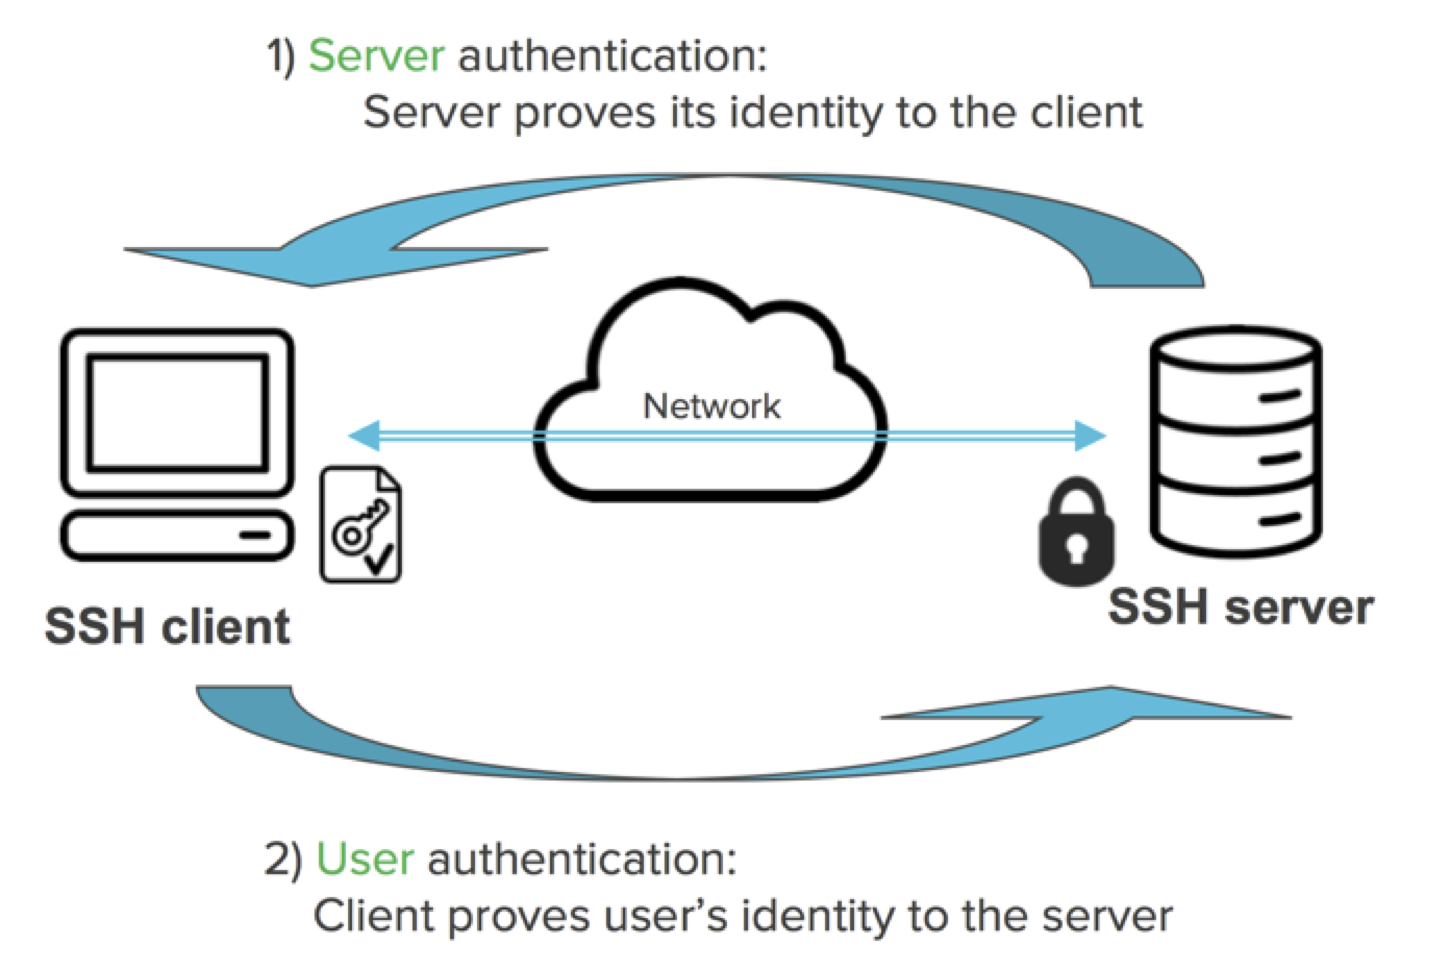
| Authentication | Offers multiple authentication methods, verifying user identity. |
| Command Execution | Allows the execution of commands and scripts on the remote device. |
| File Transfer | Supports secure file transfer between the Mac and the IoT device. |
The significance of mastering SSH is particularly pronounced when managing IoT devices, especially if you're using a Mac. This article acts as a comprehensive guide, designed to equip you with the knowledge and practical skills needed to remotely manage your IoT devices efficiently and securely. This will lay the groundwork for the rest of the guide.
Given the proliferation of IoT devices and their deployment in diverse locations, physical access is often impractical. SSH offers a reliable solution, enabling you to manage these devices remotely. By leveraging SSH, you gain the ability to:
- Establish secure connections to your IoT devices from any location with internet access.
- Execute commands and scripts to automate a variety of tasks, saving time and effort.
- Transfer files seamlessly between your Mac and your IoT devices, facilitating data management and updates.
The advantages of SSH extend beyond mere convenience; it plays a crucial role in safeguarding your data during transmission, thereby minimizing the risks associated with unauthorized access. This inherent security makes SSH the preferred choice for a wide array of IoT applications, especially those where the protection of data is of utmost importance.
Advantages of SSH Over Other Protocols
Compared to other remote access protocols, SSH offers several distinct advantages, making it a superior choice for secure IoT management:
- Sausage Party Burrito A Delicious Twist On A Classic Discover Now
- Free Use Fantasy Unleash Your Creativity Build Worlds
- Strong Encryption: SSH employs robust encryption algorithms to ensure secure communication, safeguarding data confidentiality.
- Public Key Authentication: SSH supports public key authentication, providing an added layer of security by eliminating the need for password-based logins.
- Wide Compatibility: SSH is compatible with a vast range of devices and operating systems, ensuring broad applicability across various IoT ecosystems.
Before embarking on the setup of SSH for your IoT devices, it's essential to ensure you have the following prerequisites in place:
- A Mac computer with a recent version of macOS installed.
- An IoT device that possesses SSH server capabilities. This is common in most modern devices, but may need enabling.
- A stable and reliable internet connection.
- A basic understanding of terminal commands. If you're new to terminal commands, the subsequent steps will guide you.
Enabling an SSH server on your IoT device is a crucial first step. Many modern IoT devices come equipped with SSH server functionalities, although they often need to be manually enabled before use. Here's what to look for
Steps to Enable SSH on Your IoT Device
1. Access the IoT Device: Begin by connecting to your IoT device using its default interface. This could involve accessing a web UI through your browser, or connecting via a command-line interface (CLI). The access point will vary from device to device.
2. Locate the SSH Settings: Within the device's settings menu, search for options related to SSH. This menu may have different names, such as "Networking," "Security," or "Remote Access," depending on the device. Locate the section related to SSH settings.
3. Enable SSH: Once you've located the SSH settings, enable the SSH server. Make a note of the device's IP address, which is vital for establishing a connection from your Mac.
Once the SSH server is enabled, your IoT device is ready to accept remote connections from your Mac.
With the SSH server up and running on your IoT device, it's time to establish a connection from your Mac. This connection allows you to remotely manage and control your IoT device.
Step-by-Step Guide
1. Open Terminal: Launch the Terminal application on your Mac. You can find it in the Utilities folder within your Applications folder, or by using Spotlight search.
2. Enter the SSH Command: In the Terminal window, type the following command. Make sure to replace "username" and "IP_address" with the appropriate credentials for your IoT device:
ssh username@IP_address
3. Authenticate: After entering the SSH command, you'll be prompted to authenticate. This typically involves entering your password. Alternatively, you might be using public key authentication.
Upon successful authentication, you'll establish a secure connection to your IoT device, enabling you to execute commands and manage it remotely.
Maintaining a secure SSH connection is paramount when working with IoT devices. Here's a breakdown of essential best practices to strengthen the security of your SSH connections:
- Use Strong Passwords or Public Key Authentication: Opt for robust, unique passwords or implement public key authentication.
- Disable Root Login: To prevent unauthorized access, consider disabling root login.
- Change the Default SSH Port: As an added security measure, change the standard SSH port (port 22) to a less common, non-standard port.
Adhering to these measures significantly reduces the likelihood of unauthorized access to your IoT devices.
Public Key Authentication
Public key authentication is a significantly more secure method for authenticating SSH connections. By using cryptographic keys instead of passwords, you reduce the risk of brute-force attacks and improve overall security. Here's how to set it up:
1. Generate Key Pair: On your Mac, use the following command in Terminal to generate a key pair:
ssh-keygen
Follow the prompts to specify a location for the key pair (the default is usually fine), and optionally set a passphrase. The passphrase adds an extra layer of security; if the private key is compromised, the passphrase will be required to use it.
2. Copy Public Key: Once the key pair is generated, copy your public key to your IoT device using the following command, replacing "username" and "IP_address" with your device's details:
ssh-copy-id username@IP_address
This command will prompt you for your password on the IoT device to allow the public key to be added to the authorized_keys file on the device.
3. Test Connection: After copying the public key, test your configuration by attempting to connect to your IoT device using SSH. You should be able to connect without being prompted for a password.
If you're asked for a password at this stage, double-check that your public key has been correctly added to the authorized_keys file on your IoT device. Review your SSH configuration to ensure the keys are set up as intended.
Even with a carefully constructed setup, issues can occasionally arise when using SSH. Here's a rundown of common problems and solutions to help you troubleshoot them:
- Connection Refused: If you see a "Connection Refused" error, verify that the SSH server is active and running on your IoT device. Double-check the IP address and ensure it's correct.
- Authentication Failed: When you receive an "Authentication Failed" message, review your username, password, and public key configuration. Ensure that the correct credentials are being used and that public key authentication is set up correctly.
- Timeout Errors: Timeouts can be caused by network issues. Ensure that your internet connection is stable and that there aren't any firewall restrictions blocking the SSH connection. Check your firewall settings, both on your Mac and your network router, to confirm they aren't interfering with the connection.
As you grow more accustomed to basic SSH operations, you can start to explore more advanced functionalities to enhance your workflow. This will help you to automate tasks and operate more efficiently.
- SSH Tunnels: Create secure tunnels for forwarding data between devices, adding an extra layer of security.
- SSH Config File: Simplify connection management by using an SSH config file.
- Automated Scripts: Use SSH to automate repetitive tasks on your IoT devices.
These features can significantly reduce the time and effort you spend on managing your IoT devices, making your overall experience more streamlined and effective.
The utilization of SSH for remote IoT access is a cost-effective choice, particularly when compared to proprietary software or hardware solutions. With SSH, you have the ability to:
- Avoid subscription fees by leveraging free, open-source tools.
- Minimize hardware expenses by making use of your existing devices.
- Scale your IoT ecosystem without accumulating extra costs.
Opting for SSH allows you to achieve professional-grade remote access without imposing significant financial constraints.