Can you truly capture the ephemeral dance of fire on paper, breathing life into its fiery essence? The ability to draw fire is not merely a technical skill; it's a pathway to unlocking the raw power and dynamic energy that defines the very core of artistic expression.
Delving into the art of depicting flames requires more than just a casual observation. It necessitates an understanding of the science behind fire, its spectrum of colors, and the fluid forms it takes. Whether you're aiming to create photorealistic flames or stylized fire for fantastical illustrations, mastering the fundamentals of fire drawing significantly enhances your artistic abilities.
This guide offers a detailed, step-by-step approach to drawing fire, from understanding its basic structure to incorporating the finishing touches that make your artwork truly captivating and realistic. By the end, you'll have the confidence to not only include fire in your artwork but also to make it a central, compelling element.
- Discover Brazilian Pizza Flavors Culture Youll Love
- I Aint Reading All That Meme Origins Popularity Impact
Table of Contents
- Understanding Fire Basics
- Tools You'll Need
- Basic Techniques for Drawing Fire
- Understanding Fire Colors
- Shading Techniques for Realistic Flames
- Capturing the Movement of Fire
- Different Styles of Drawing Fire
- Tips for Improving Your Fire Drawings
- Examples of Fire Art
Understanding Fire Basics
What is Fire?
Before embarking on the journey of drawing fire, it's vital to grasp its fundamental nature and behavior. Fire is essentially a rapid chemical reactiona combustion processthat occurs when fuel, oxygen, and heat are combined. This reaction unleashes light, heat, and various gases, producing the visible flames we perceive.
The temperature of fire plays a critical role in determining its color and intensity. Cooler flames tend to appear orange or yellow, while hotter flames exhibit shades of blue or white. A keen understanding of these color variations will greatly enhance your ability to create diverse and realistic fire drawings.
Tools You'll Need
The right tools can make a significant difference in your artistic endeavors. Here's a list of essential tools for drawing fire:
- Dive Deeper Mastering The Diving Face Split Technique
- Nestl Quality Innovation Sustainability Explained Google Discover
- Pencils (various hardness levels, from soft to hard)
- Charcoal sticks or pencils
- Blending stumps or tortillons
- Erasers (kneaded eraser and a regular eraser)
- Colored pencils or markers (optional, but useful for adding color and highlights)
Experimenting with different mediums will help you discover what best suits your individual style and preferences. Consider exploring different types of paper as well, as this will affect how your chosen medium behaves.
Basic Techniques for Drawing Fire
Step-by-Step Guide
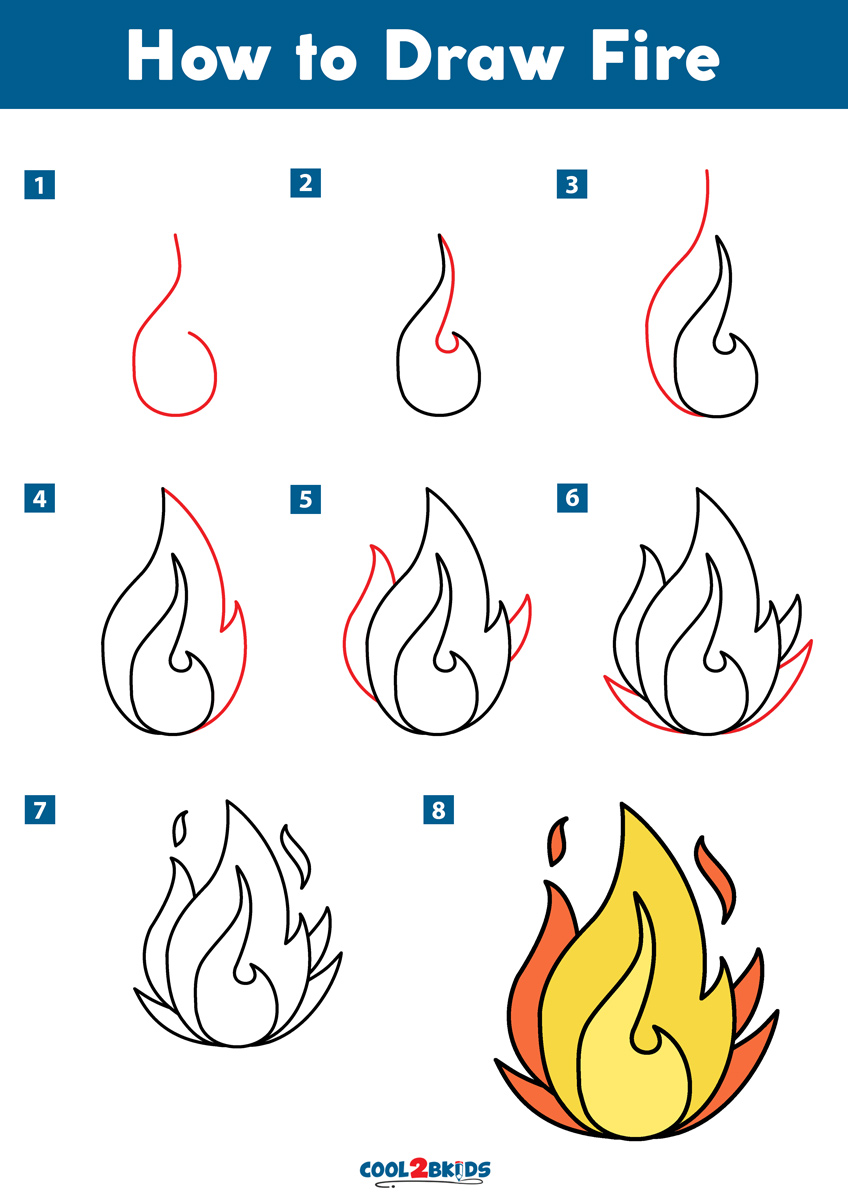
Drawing fire successfully demands a blend of techniques to truly capture its essence. Follow these steps to create a basic, yet compelling, flame:
- Begin by sketching the general shape of the flame using light, delicate lines. These initial lines will serve as a guide for the final form.
- Gradually add layers of shading to create depth, dimension, and the illusion of movement within the flame.
- Utilize blending tools to soften the edges of the shading and produce seamless transitions between colors, giving the fire a smooth, flowing appearance.
- Carefully highlight the brightest areas of the flame. This will amplify the realism and add the effect of light radiating from the core of the fire.
Understanding Fire Colors
Fire's visual presence is not defined by a single color. It's a dynamic spectrum of hues that change based on its temperature. Here's a breakdown of the colors:
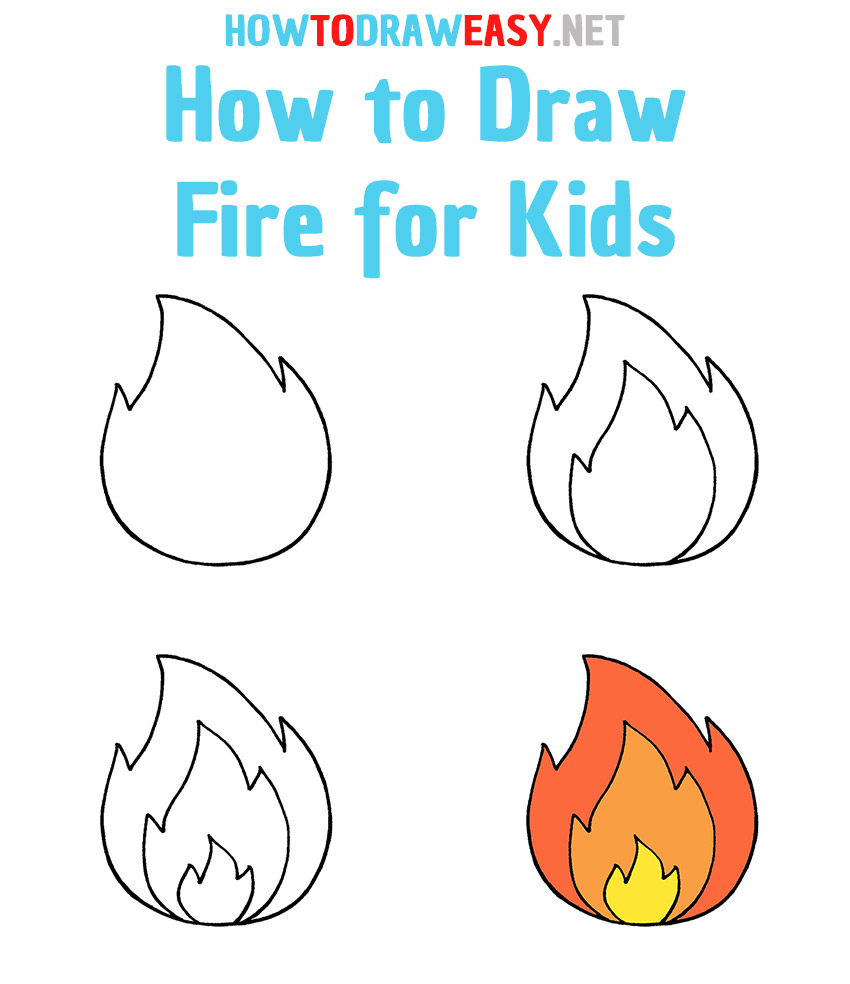
- Yellow and orange: These colors represent cooler flames, often found at the base of the fire where the fuel is being consumed.
- Red: Red indicates intermediate-temperature flames, which are commonly found in the middle sections of the fire.
- Blue and white: These hues signify hotter flames, typically located at the tips or peaks of the fire where the combustion process is most intense.
Incorporating this color palette into your drawings is critical for achieving an authentic and dynamic fire representation.
Shading Techniques for Realistic Flames
Shading is a key component for creating believable fire. Here are several techniques to try and master:
- Cross-hatching: Use cross-hatching to progressively build layers of shading and add depth.
- Blending charcoal or graphite: Employ blending tools, such as blending stumps or your fingers, to achieve smooth transitions between the different colors of the fire.
- Pressure variation: Apply light pressure for subtle shading and gradually increase pressure in darker areas to create the illusion of volume and form.
Practicing these shading techniques will help you achieve the desired effects in your fire drawings. Remember to experiment with the pressure and angle of your drawing tool for different visual results.
Capturing the Movement of Fire
Fire is in constant motion, and capturing this dynamism can inject life into your artwork. Consider these tips to capture that constant flux:
- Study visual references, such as videos or photos of real fire, to observe its movement patterns. Note how the flames dance and shift.
- Employ curved lines to convey the flow and direction of the flames. This helps to create a sense of the fire's dance.
- Vary the size and shape of the flames to increase dynamism and make the fire appear more engaging and realistic. The flames shouldn't be uniform.
By incorporating movement into your drawings, you can create far more engaging and believable fire art.
Different Styles of Drawing Fire
Realistic vs. Stylized Fire
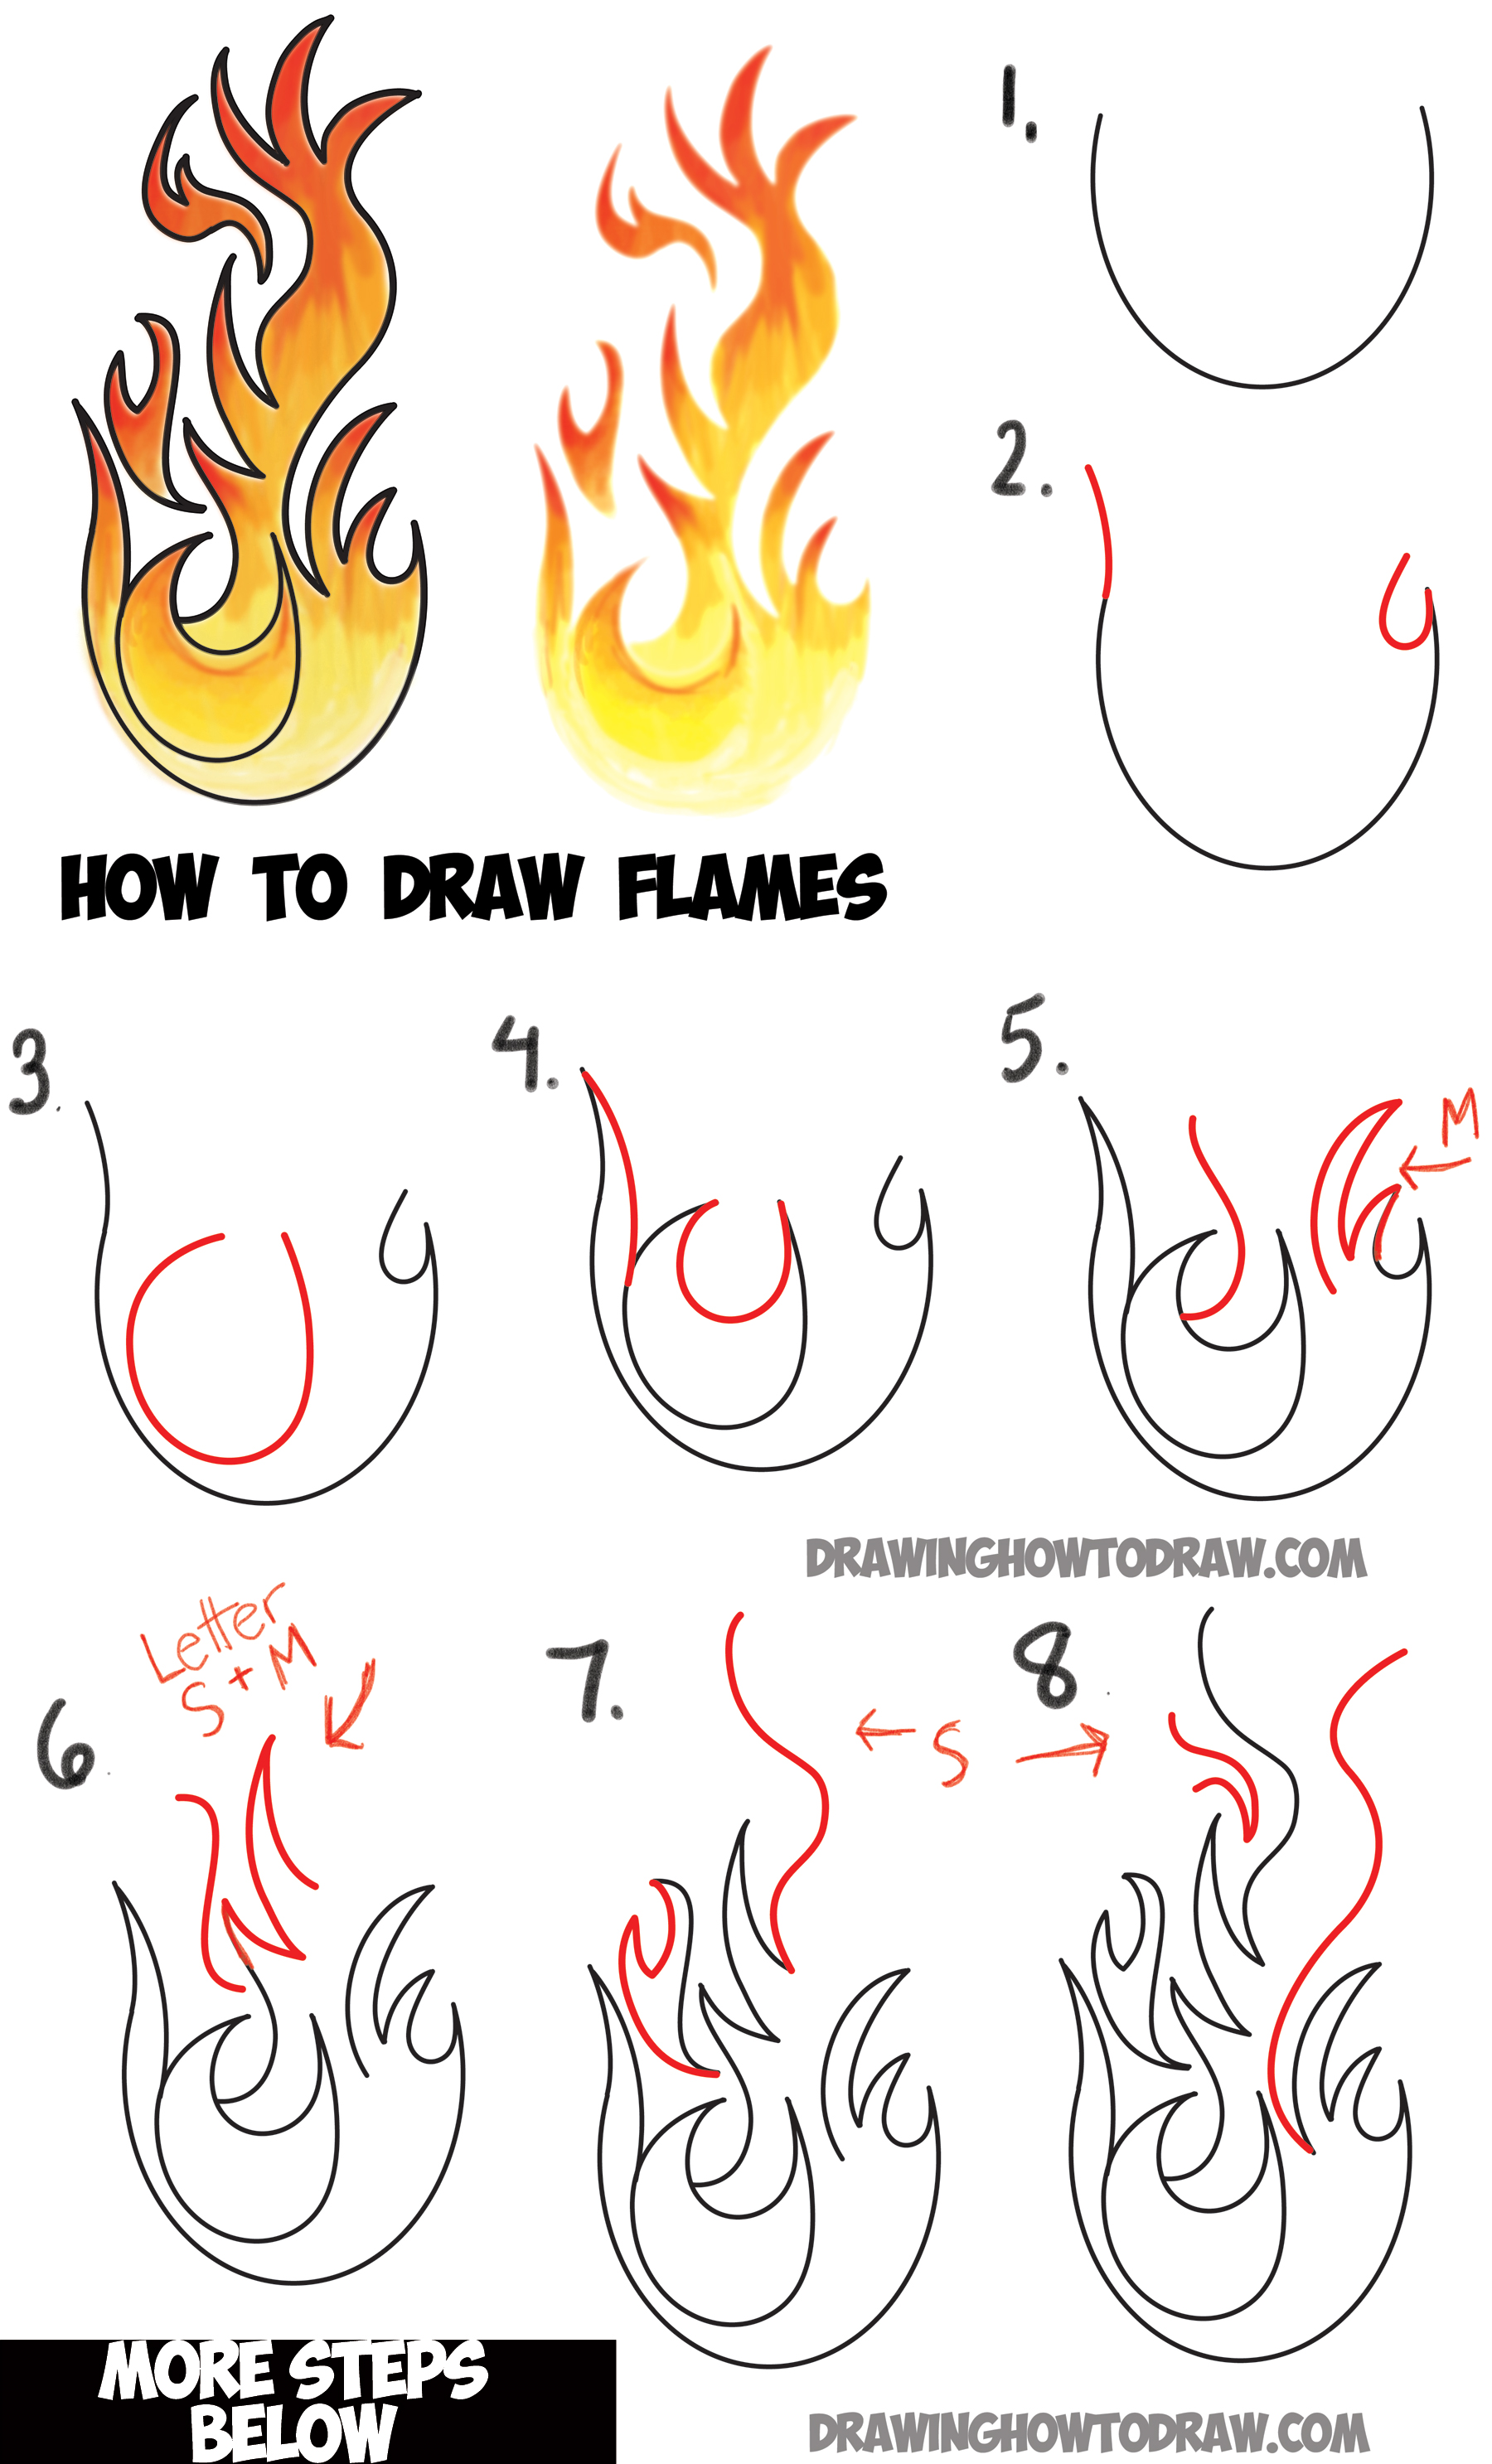
Artists use diverse approaches to draw fire. These approaches range from photorealistic to stylized interpretations. Realistic fire drawings aim to replicate the appearance of actual flames as closely as possible, while stylized fire prioritizes the exaggeration of certain features for artistic effect.
Experiment with both styles to find which best suits your artistic vision and helps you to best express your personal creativity.
Tips for Improving Your Fire Drawings
Here are a few additional tips to elevate your fire drawings:
- Practice consistently and regularly to hone and refine your skills. The more you draw fire, the more comfortable you will become with the techniques.
- Study the artwork of other artists. Inspiration is key.
- Experiment with diverse tools and techniques to find which ones resonate with you.
Remember, practice, and persistence are the pillars of mastering the art of fire drawing.
Examples of Fire Art
Studying existing examples of fire art can be an invaluable source of insight and inspiration. Here are some types of fire art to explore:
- Realistic flame portraits
- Fantasy fire creatures
- Abstract fire designs
Analyze these examples to gain a deeper understanding of how to effectively draw fire and experiment with different techniques.
| Subject Matter | Fire |
| Artistic Styles | Realistic, Stylized, Abstract |
| Tools and Techniques | Pencils, Charcoal, Blending Stumps, Layering, Shading, Color Blending, Cross-Hatching |
| Color Palette | Yellow, Orange, Red, Blue, White |
| Key Concepts | Understanding Fire Basics, Movement, Temperature Variation |
| Inspirational Sources | Real-life Fire, Artistic Examples, Tutorials, Online Art Communities |
| Reference Link | Artists Network |
- Taylor Swifts Dance A Deep Dive Into Her Iconic Performances
- Sweet Chin Music Aux Trend Meaning Impact More